


.jpg)
£ 8.85
DIY Tips: How to Install Your Own Blinds or Curtains
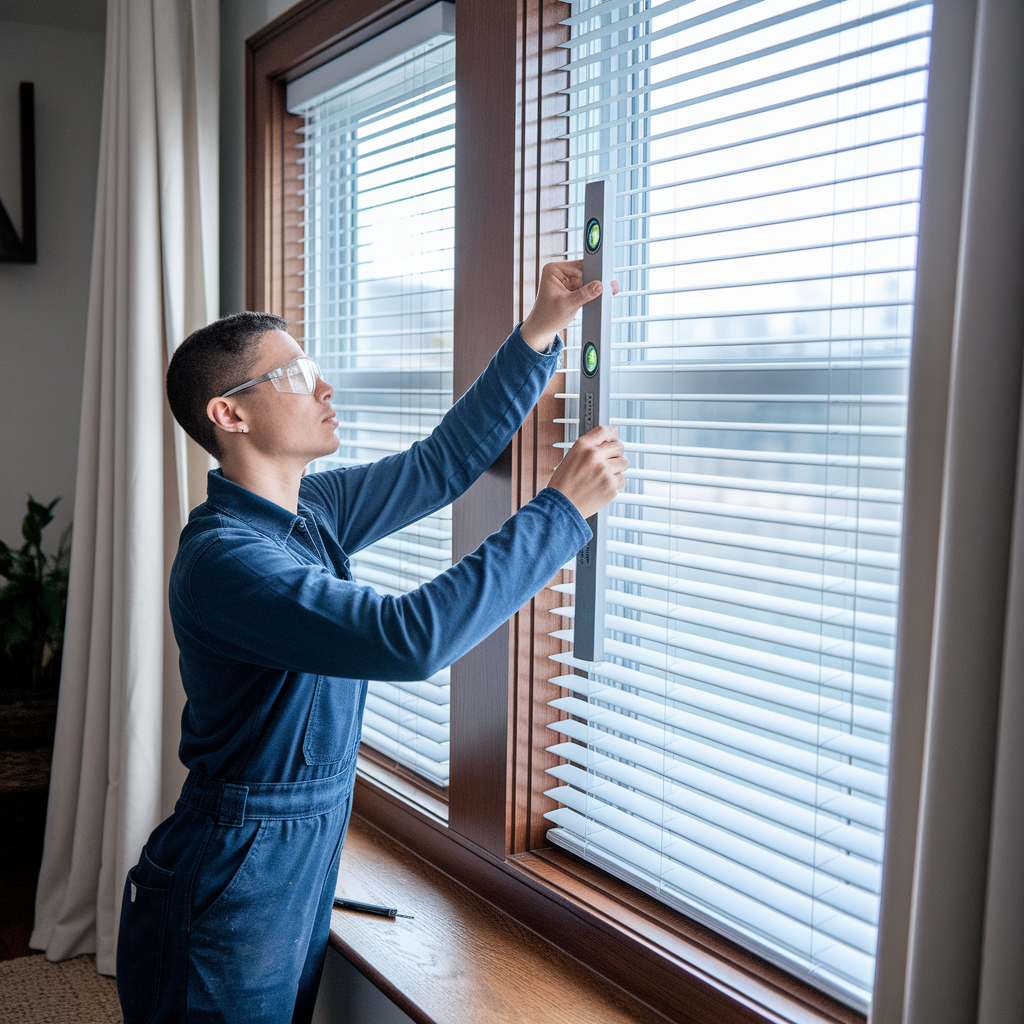
 DIY Tips: How to Install Your Own Blinds or Curtains Installing blinds or curtains can seem like a daunting task, but with the right tools, a bit of patience, and some DIY know-how, it’s a project you can easily tackle on your own. Whether you’re looking to refresh the look of a room or save on professional installation costs, this step-by-step guide will walk you through the process of installing your blinds or curtains with ease. 1. Gather the Tools and Materials Before you begin, make sure you have everything you need. Here's a list of the basic tools and materials you’ll need for a successful installation: Measuring tape Level Pencil Power drill or screwdriver Screws or curtain brackets (provided with your blinds/curtains) Wall anchors (if needed) Step ladder (if installing high windows) Curtain rod or blind hardware (depending on your chosen window treatment) 2. Measure Your Windows Proper measurement is key to making sure your blinds or curtains fit perfectly. Here’s how to measure your windows for accurate installation: For Blinds: Width: Measure the width of your window frame at the top, middle, and bottom. Use the smallest of these measurements to determine the width of your blinds. Length: Measure the height from the top of the window frame to where you want your blinds to hang (usually just above the sill). If you prefer your blinds to cover the window entirely, add a few extra inches to the length. For Curtains: Width: Measure the width of your window and add at least 12 inches on each side to ensure your curtains provide enough coverage when closed. For a fuller, more dramatic look, consider adding 1.5 to 2 times the width of your window for a luxurious look. Length: Measure the distance from the top of the window (or where you want the curtain rod to hang) to the floor. For a sophisticated look, curtains can touch the floor, “puddle” slightly, or hang just above the floor, depending on your style. 3. Mark the Installation Points Once you have your measurements, it’s time to mark where your brackets or curtain rod will be installed. Here’s how to do it: For Blinds: Using a pencil and a level, mark where the top of the blinds will go on the wall. Make sure the marks are level across the width of the window to ensure even installation. Mark the spots where you’ll need to drill for the brackets (usually one on each side of the window). For Curtains: Mark where you want the curtain rod to sit. Typically, curtain rods are installed about 4-6 inches above the window frame to give the illusion of taller windows. Use a level to ensure your markings are straight and even across the window. You can also mark the distance from the window frame to determine how far out you want the curtains to hang, giving you more space for the curtain panels to open fully. 4. Install the Brackets or Curtain Rod Now, you’re ready to install the hardware that will hold your blinds or curtains. For Blinds: Drill Holes: Using a power drill, drill holes at the marks you made for the brackets. If you're drilling into drywall and don't have studs to drill into, use wall anchors to ensure the brackets stay securely in place. Install Brackets: Attach the blinds brackets to the wall using the screws provided. Make sure the brackets are level and positioned securely. Hang the Blinds: Once the brackets are installed, place the blinds into the brackets, securing them with the clips or hardware that came with your blinds. For Curtains: Install Curtain Rod Brackets: Use your drill or screwdriver to attach the curtain rod brackets to the wall at the marked points. Make sure the brackets are spaced evenly and are level to ensure the curtain rod hangs straight. Hang the Curtain Rod: Once the brackets are secure, slide your curtain rod into place. If you’re using a tension rod, place it between the two brackets, or if you’re using rings or hooks, slide the curtains onto the rod before mounting it. 5. Hang the Curtains or Blinds Now comes the fun part—hanging your window treatments! For Blinds: Secure the Blinds: Once the blinds are mounted on the brackets, ensure they are aligned properly. Some blinds have additional securing pieces that need to be clicked into place to prevent them from moving. Adjust the Blinds: Test the operation of your blinds by pulling them up and down to ensure they work smoothly. Adjust the length of the cord (if applicable) to your preferred height. For Curtains: Attach Curtains to the Rod: If your curtains have hooks or rings, attach them to the curtain rod. If they have grommets, simply slide the rod through the holes in the fabric. Adjust the Curtains: Hang the curtains evenly on the rod, making sure they fall nicely. If the curtains are too long or too short, adjust them accordingly. 6. Final Adjustments and Test Now that your blinds or curtains are in place, take a step back and evaluate the look. Are the window treatments hanging evenly? Are they positioned where you want them? Test the blinds or curtains to ensure they open and close smoothly. For Blinds: Make sure they’re fully functional and easy to raise, lower, or tilt. For Curtains: Check if they hang evenly and adjust the pleats or folds for a more uniform look. 7. Finishing Touches To complete the look of your new window treatments, consider these finishing touches: Tiebacks for Curtains: If you’ve chosen curtains, add decorative tiebacks for a more polished and sophisticated look. Tiebacks not only help open the curtains but also add an extra touch of style to the room. Valances or Cornices: Adding a valance or cornice board can hide curtain rods or blind mechanisms, creating a more refined look in your space. Blinds Accessories: Some blinds come with additional accessories such as side panels or decorative finishes, which can be added to create a more custom appearance. 8. Conclusion Installing your own blinds or curtains is a simple and cost-effective way to enhance the look and function of your home. With just a few basic tools, careful measurements, and attention to detail, you can easily complete the installation yourself, saving time and money. Plus, there’s a satisfying sense of accomplishment in transforming a room with your own hands! Remember, the key to a successful installation is preparation. Take your time, measure carefully, and ensure everything is level and securely fastened, and your new window treatments will look fantastic for years to come!
Related Articles
- Address: 1178 Uxbridge Road, Hayes,
London, UB4 8JB - Email: info@crystalinteriors.uk
- Email: contact@crystalinteriors.uk
- Phone: (+44) 020 8127 6696
- Phone: (+44) 078 3239 773
Search our site